Listener에 등록을 하여 이벤트 처리를 하는 것.
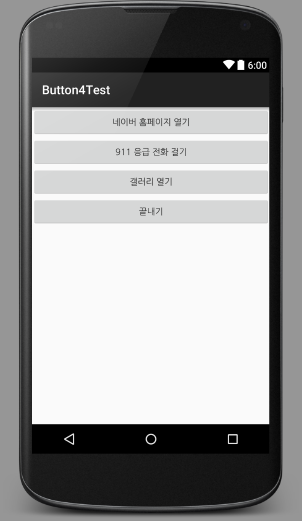
MainActivity.java
1 2 3 4 5 6 7 8 9 10 11 12 13 14 15 16 17 18 19 20 21 22 23 24 25 26 27 28 29 30 31 32 33 34 35 36 37 38 39 40 41 42 43 44 45 46 47 48 49 | package com.button4test; import android.app.Activity; import android.content.Intent; import android.net.Uri; import android.os.Bundle; import android.view.View; import android.widget.Button; public class MainActivity extends Activity { Button btn_naver,btn_911,btn_gallery,btn_end; @Override protected void onCreate(Bundle savedInstanceState) { super.onCreate(savedInstanceState); setContentView(R.layout.activity_main); btn_naver=(Button)findViewById(R.id.btn_naver); btn_911=(Button)findViewById(R.id.btn_911); btn_gallery=(Button)findViewById(R.id.btn_gallery); btn_end=(Button)findViewById(R.id.btn_end); btn_naver.setOnClickListener(new View.OnClickListener() { @Override public void onClick(View v) { Intent mIntent=new Intent(Intent.ACTION_VIEW, Uri.parse("http://naver.com")); startActivity(mIntent); } }); btn_911.setOnClickListener(new View.OnClickListener() { @Override public void onClick(View v) { Intent mIntent=new Intent(Intent.ACTION_VIEW,Uri.parse("tel:/911")); startActivity(mIntent); } }); btn_gallery.setOnClickListener(new View.OnClickListener() { @Override public void onClick(View v) { Intent mIntent = new Intent(Intent.ACTION_VIEW,Uri.parse("content://media/internal/images/media")); startActivity(mIntent); } }); btn_end.setOnClickListener(new View.OnClickListener() { @Override public void onClick(View v) { finish(); } }); } } | cs |
activity_main.xml
1 2 3 4 5 6 7 8 9 10 11 12 13 14 15 16 17 18 19 20 21 22 23 24 25 26 27 | <LinearLayout xmlns:android="http://schemas.android.com/apk/res/android" xmlns:tools="http://schemas.android.com/tools" android:layout_width="match_parent" android:layout_height="match_parent" android:orientation="vertical" tools:context=".MainActivity"> <Button android:layout_width="match_parent" android:layout_height="wrap_content" android:id="@+id/btn_naver" android:text="네이버 홈페이지 열기"/> <Button android:layout_width="match_parent" android:layout_height="wrap_content" android:id="@+id/btn_911" android:text="911 응급 전화 걸기"/> <Button android:layout_width="match_parent" android:layout_height="wrap_content" android:id="@+id/btn_gallery" android:text="갤러리 열기"/> <Button android:layout_width="match_parent" android:layout_height="wrap_content" android:id="@+id/btn_end" android:text="끝내기"/> </LinearLayout> | cs |
'프로그래밍 > Java, Android' 카테고리의 다른 글
| (Java) jsr 확인 하는 곳 (0) | 2016.07.10 |
|---|---|
| (안드로이드) 계산기 프로그램 (0) | 2016.07.10 |
| (안드로이드-이클립스) 화면 세로방향과 가로방향 설정하는 방법 (0) | 2016.07.09 |
| (안드로이드) 파일 처리 응용 (0) | 2016.07.09 |
| (안드로이드) 파일처리 예시 소스 (0) | 2016.07.09 |


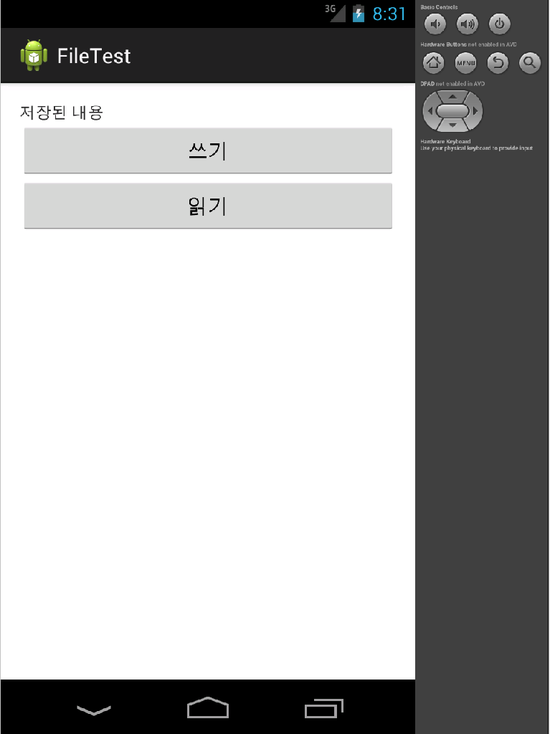
 FileTest.zip